TECHNIQUES FOR THE HEAD
(Sample from the Chapter)
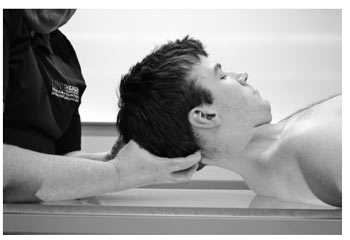
TUCKER TECHNIQUE FOR THE POSTERIOR OA
(Video 1 – on www. osteomasterstechniques.com)
PHYSICIAN: Standing at the head of the table
PATIENT: Supine
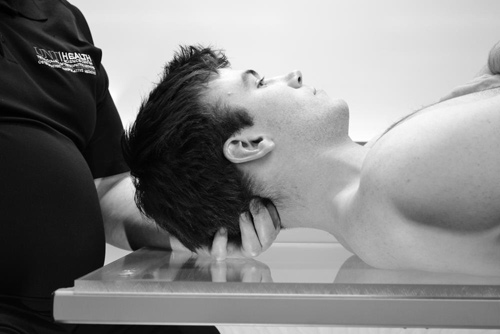
Step 1
- Place your left hand under their OA and turn the patient’s head to the left side while flexing it, so as to gap open the right side. Then bring the arch of the atlas into prominence on that side
Step 2
- Insert your fingers or thumb of your right hand between the arch of their atlas and their occiput until your finger or thumb come into contact with the arch


Steps 3 and 4
- Maintain pressure on their atlas with your right fingers or thumb and draw their neck back to the limit of motion to the right, until all articulations on the left are tensed.
- With a slight but quick further turning of their head in SLIGHT extension, the bone is lifted into place.
TUCKER’S OA POSTERIOR (ANTERIOR ATLAS) TECHNIQUE
(Video 2 – on www. osteomasterstechniques.com)
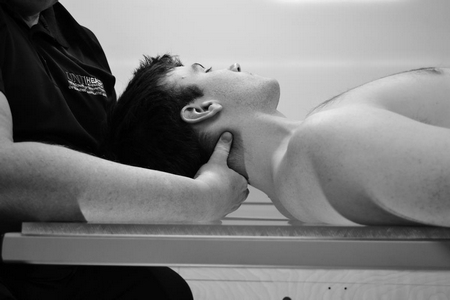
PHYSICIAN: Standing behind the patient
PATIENT: Supine
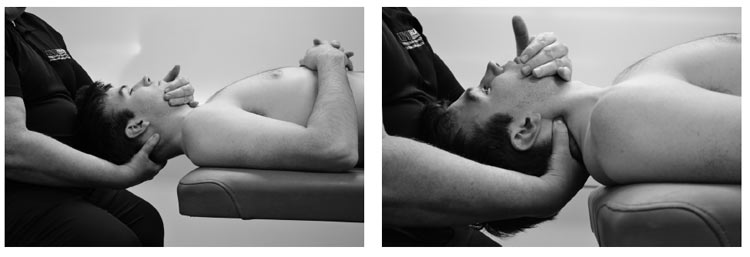
Steps 1 and 2 Step 3
- Bring their head slightly beyond the top of the table
- Place your hand under the patient’s chin and your other hand under the occiput
- Lift their head, holding their face upward until the occipito-atlantal articulation is in full extension and the weight of the body of the occiput is dragged downward on the atlas

Step 4
- Carry the patient’s head from side to side, focusing motion at their atlas, gapping open first one side and then the other side, until their atlas moves back to its normal position.
OA RELEASE TECHNIQUE (1938 Yearbook)
(Video 3 – on www. osteomasterstechniques.com)
“You can also normalize the nerve supply to the pituitary and often the vagus nerve with another technique which I will show you for adjusting the occiput. Most of these cases are curled up in the dorsal area and have the head back. That in itself narrows the chest and the occiput is anterior on their atlas. “
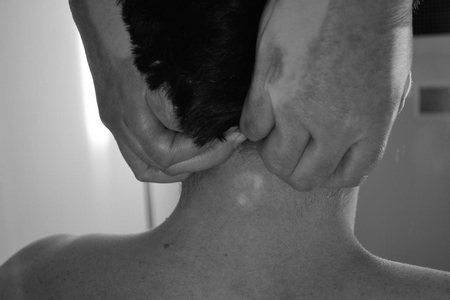
PHYSICIAN: Standing beside the patient
PATIENT: Seated
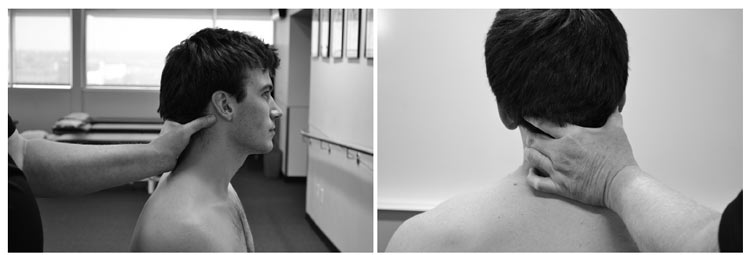
Step 1
- Place your left index and long fingers parallel along the articular pillar of their atlas with slight pressure while placing your left thumb in front of their ear. Your fingers should be up under their occiput so you feel the OA joint.
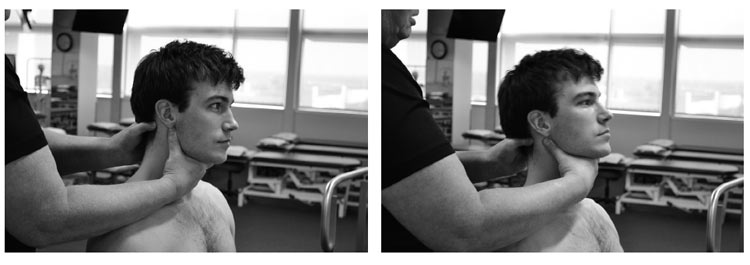
Step 2 Step 3
- Reinforce your left ring and long fingers with your right index and long finger, so the fingers of your right hand are under their occiput and your right thumb is in front of their right ear. You have the joint between the occiput and their atlas so fixed that it alone moves.
- Lift their head cephalad (upward) and rotate their occiput back at the same time

Step 4
- You then sidebend left and then right – freeing their sub-occipital musculature.
1938 Yearbook. “The physician can feel definite movement directly between the occiput and atlas. You are turning the occiput back. If the occiput slides forward it also extends a little and laterally flexes to the other side. This technique will accomplish three motions – pushes the occiput back, laterally flexes it to the same side, and flexes the head anteriorly by the lift on the occiput.”
(Video 4 – on www. osteomasterstechniques.com)
PHYSICIAN: Seated behind the patient
PATIENT: Supine
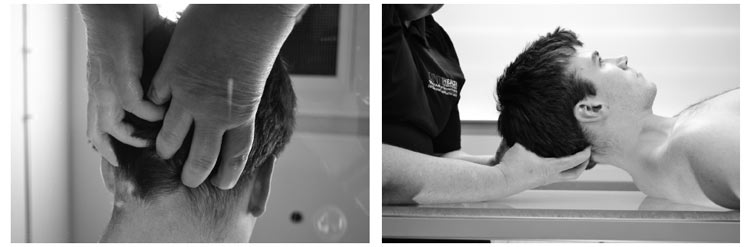
Step 1
- Place your thumbs on the patient’s opisthion with your fingers cupped around the occiput and the tips of your long fingers on each side in contact with their atlas
Step 2
- Ask the patient to nod their head or nod the patient’s head while keeping their atlas from moving with their occiput – your fingertips remain in contact with their atlas throughout
- Their atlas meet your finger, then goes away because the occiput continues to move under the physician’s pressure
- Spread your fingers apart and wait for the release.
Wales. “All you want to do with the occiput is to have it nod, and to have it flex on the atlas so that the condyles go into the divergences. I find it convenient to have their head in my two hands with the occipital squamous in my hands. Then my two long fingers are at the posterior rim of the foramen magnum ready to meet the atlas. With either hand, I can turn the head to each side. It’s a very small nodding motion. This is just what is convenient for me.”